Discovery Profile in ObserveOps
A Discovery Profile tells ObserveOps where to look for devices and how to reach them. When you run a discovery, ObserveOps scans the addresses you specify, connects using the credential profile you assign, and builds a list of reachable devices you can then provision as monitors.
Use this screen when you're adding new devices to monitoring, expanding coverage to a new subnet, or scheduling recurring discovery runs to automatically pick up new infrastructure.
Navigation
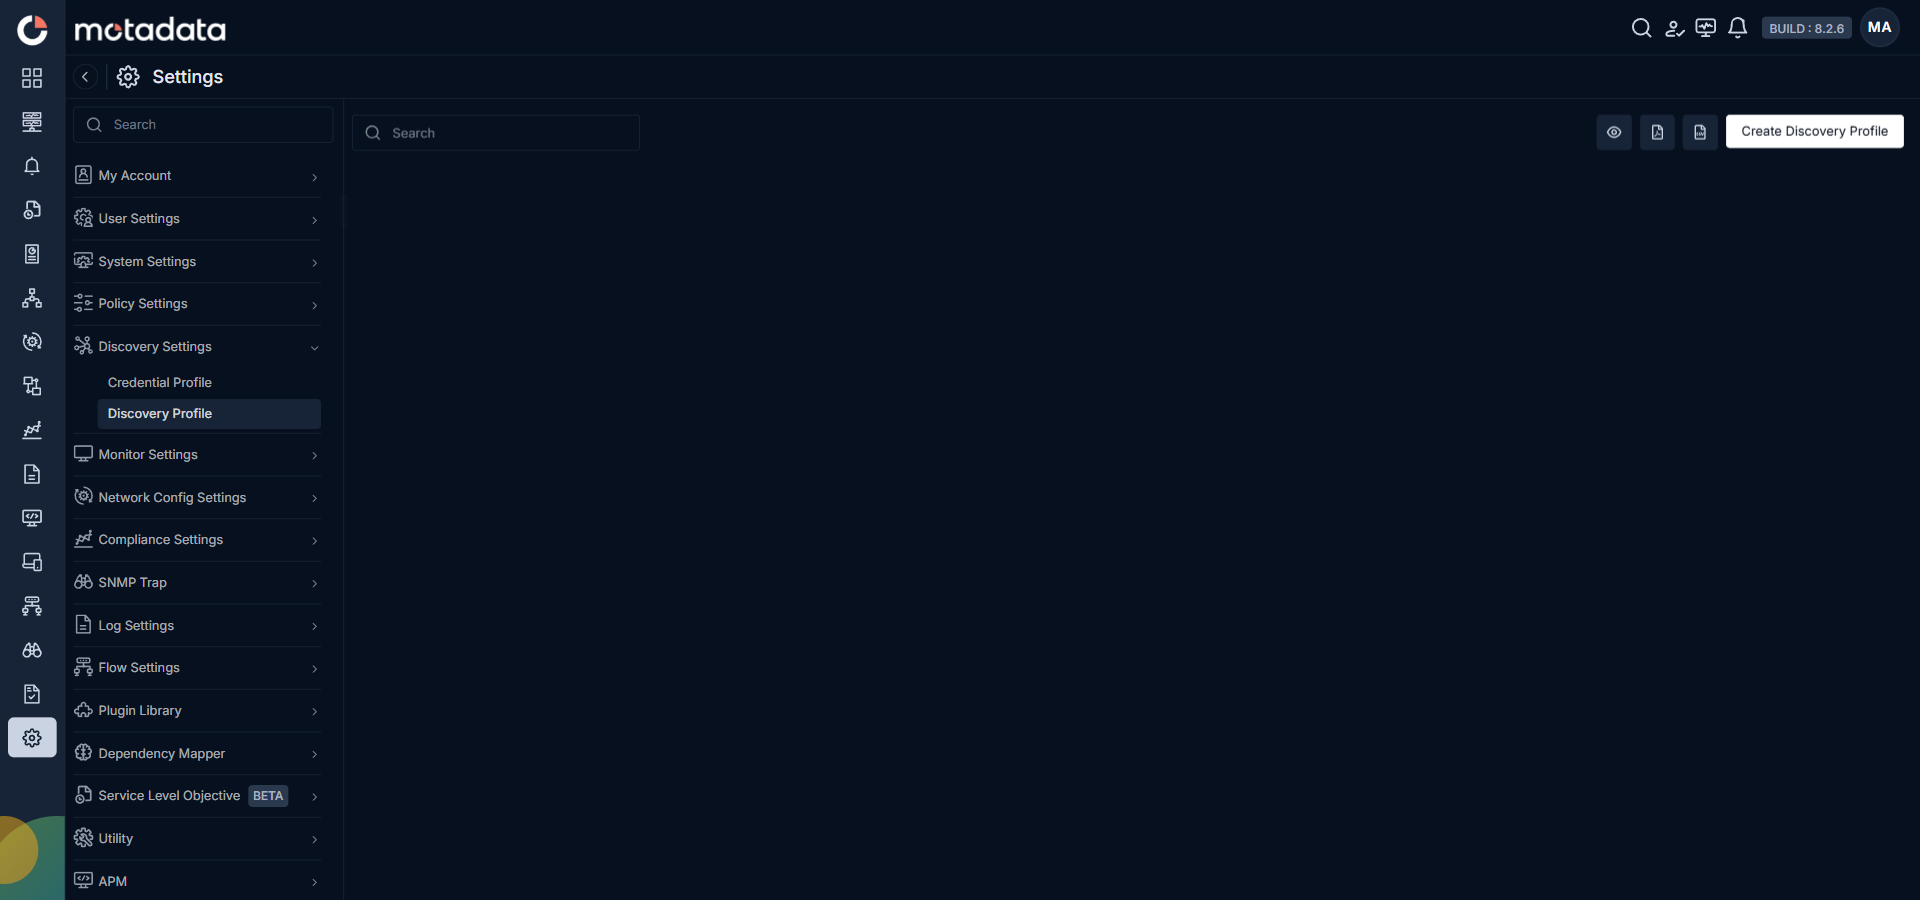
Go to Menu. Select Settings  . Select Discovery Settings
  . Select Discovery Profile. The Discovery Profile screen opens.
What the Screen Shows
Each row in the Discovery Profile grid shows one saved discovery profile.
| Column | What It Shows | When to Use It |
|---|---|---|
| Discovery Profile Name | The name you gave the profile | Identify which profile to edit or re-run |
| IP / Host / IP Range / CIDR / CSV | The address or address range this profile scans | Confirm the scope of a discovery before running it |
| Type | The device category: Server, Network, Cloud, Virtualization, and so on | Filter and find profiles for a specific infrastructure type |
| Discovered Objects | The count of devices found during the last successful run | Check after a run to confirm how many devices were found |
| Status | The timestamp and result of the last discovery run | Quickly see whether the last run succeeded or when it ran |
| Scheduler | Shows  when a future run is scheduled when a future run is scheduled | Click the icon to see the schedule details |
| Actions | Three-dot menu with Edit, Schedule, Delete, and Re-run options | Manage the profile after creation |
How to Create a Discovery Profile
Select + Create Discovery Profile in the top-right corner. A form opens on the right side.
Fill in the profile name, specify the target IP address or range, and select a credential profile. The fields available depend on the device category you select. Once you've filled in the required fields, choose how to start:
- Select Save and Run to save the profile and begin discovery immediately.
- Select Save and Exit to save the profile for later use without running it now.
ObserveOps allows discovery of devices with the same hostname but different IP addresses. If two discovered devices end up with the same monitor name, you'll need to rename at least one on the Provisioning screen before confirming.
| Category | Description |
|---|---|
| Server (Linux / Unix) | Discovers Linux and Unix servers over SSH. Learn more |
| Server (Windows) | Discovers Windows servers over PowerShell (WinRM). Learn more |
| Server (Windows Cluster) | Discovers Windows Cluster nodes. Learn more |
| Cloud | Discovers resources across AWS, Azure, Office 365, Oracle Cloud, and Google Cloud. Learn more |
| Network | Discovers network devices over SNMP. Learn more |
| SDN | Discovers Software-Defined Networking controllers. Learn more |
| Virtualization | Discovers hypervisors and virtual machines. Learn more |
| HCI | Discovers Hyper-Converged Infrastructure nodes. Learn more |
| Storage | Discovers storage arrays and NAS devices. Learn more |
| Wireless | Discovers wireless access points and controllers. Learn more |
| Service Check | Discovers network services such as HTTP, DNS, SMTP, and FTP. Learn more |
| WAN Link | Discovers IP SLA-enabled WAN links. Learn more |
| Container Runtime | Discovers Docker and other container runtimes. Learn more |
| Container Orchestration | Discovers Kubernetes and other container orchestration platforms. Learn more |
| Database | Discovers database instances. Learn more |
| Other Devices | Discovers additional device types not covered above. Learn more |
How to Run a Discovery
Select  in the Actions column for the profile you want to run. Select the re-run icon
  to start a new discovery scan using that profile.
ObserveOps scans the addresses in the profile and updates the Discovered Objects count and Status column when the run completes.
How to Schedule a Discovery Profile
Select in the Actions column. Select Schedule Discovery Profile. A scheduling panel opens.
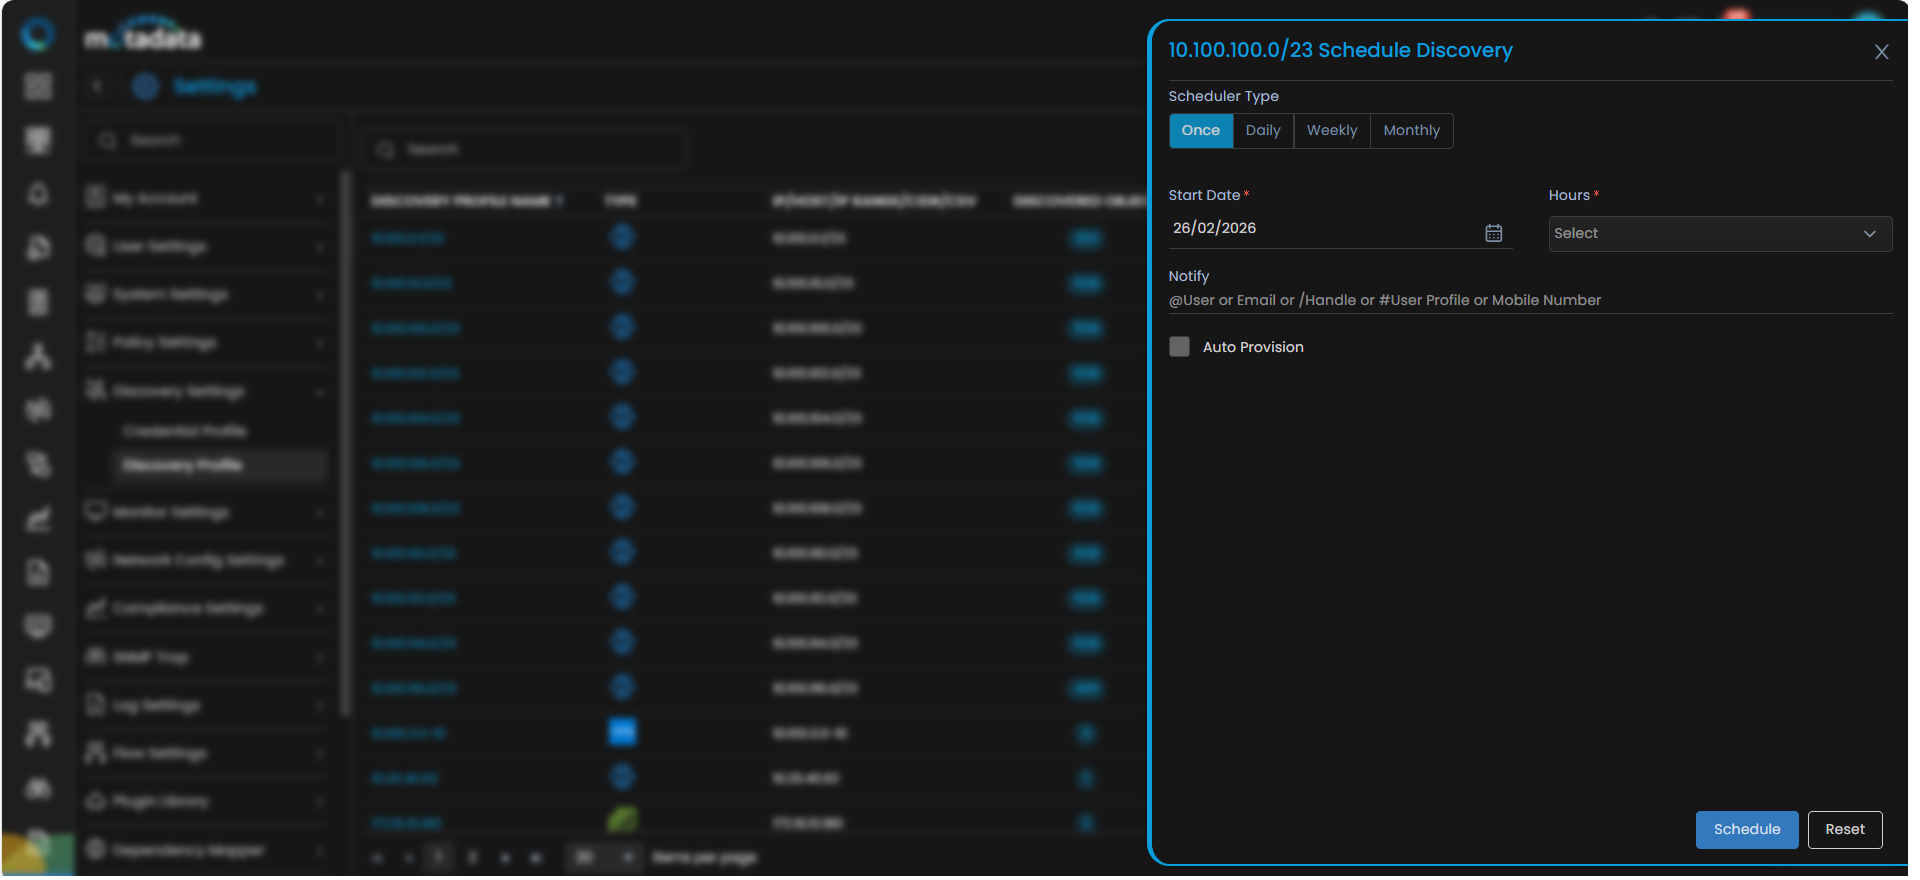
| Field | Description |
|---|---|
| Scheduler Type | How often ObserveOps runs this discovery. Select Once, Daily, Weekly, or Monthly. |
| Start Date | The date of the first scheduled run. |
| Hours | The time of day for the discovery run. |
| Notify | Email addresses, handles, usernames, or mobile numbers that receive a notification when the discovery completes. |
| Auto Provision | When checked, ObserveOps automatically provisions all discovered devices as monitors after each run without requiring manual selection. |
Select Schedule to save the schedule. Select Reset to clear your selections.
The Scheduler column in the grid shows when a profile has an active schedule. Click the icon to view the schedule details.
How to Edit a Discovery Profile
Select in the Actions column. Select Edit Discovery Profile  .
.
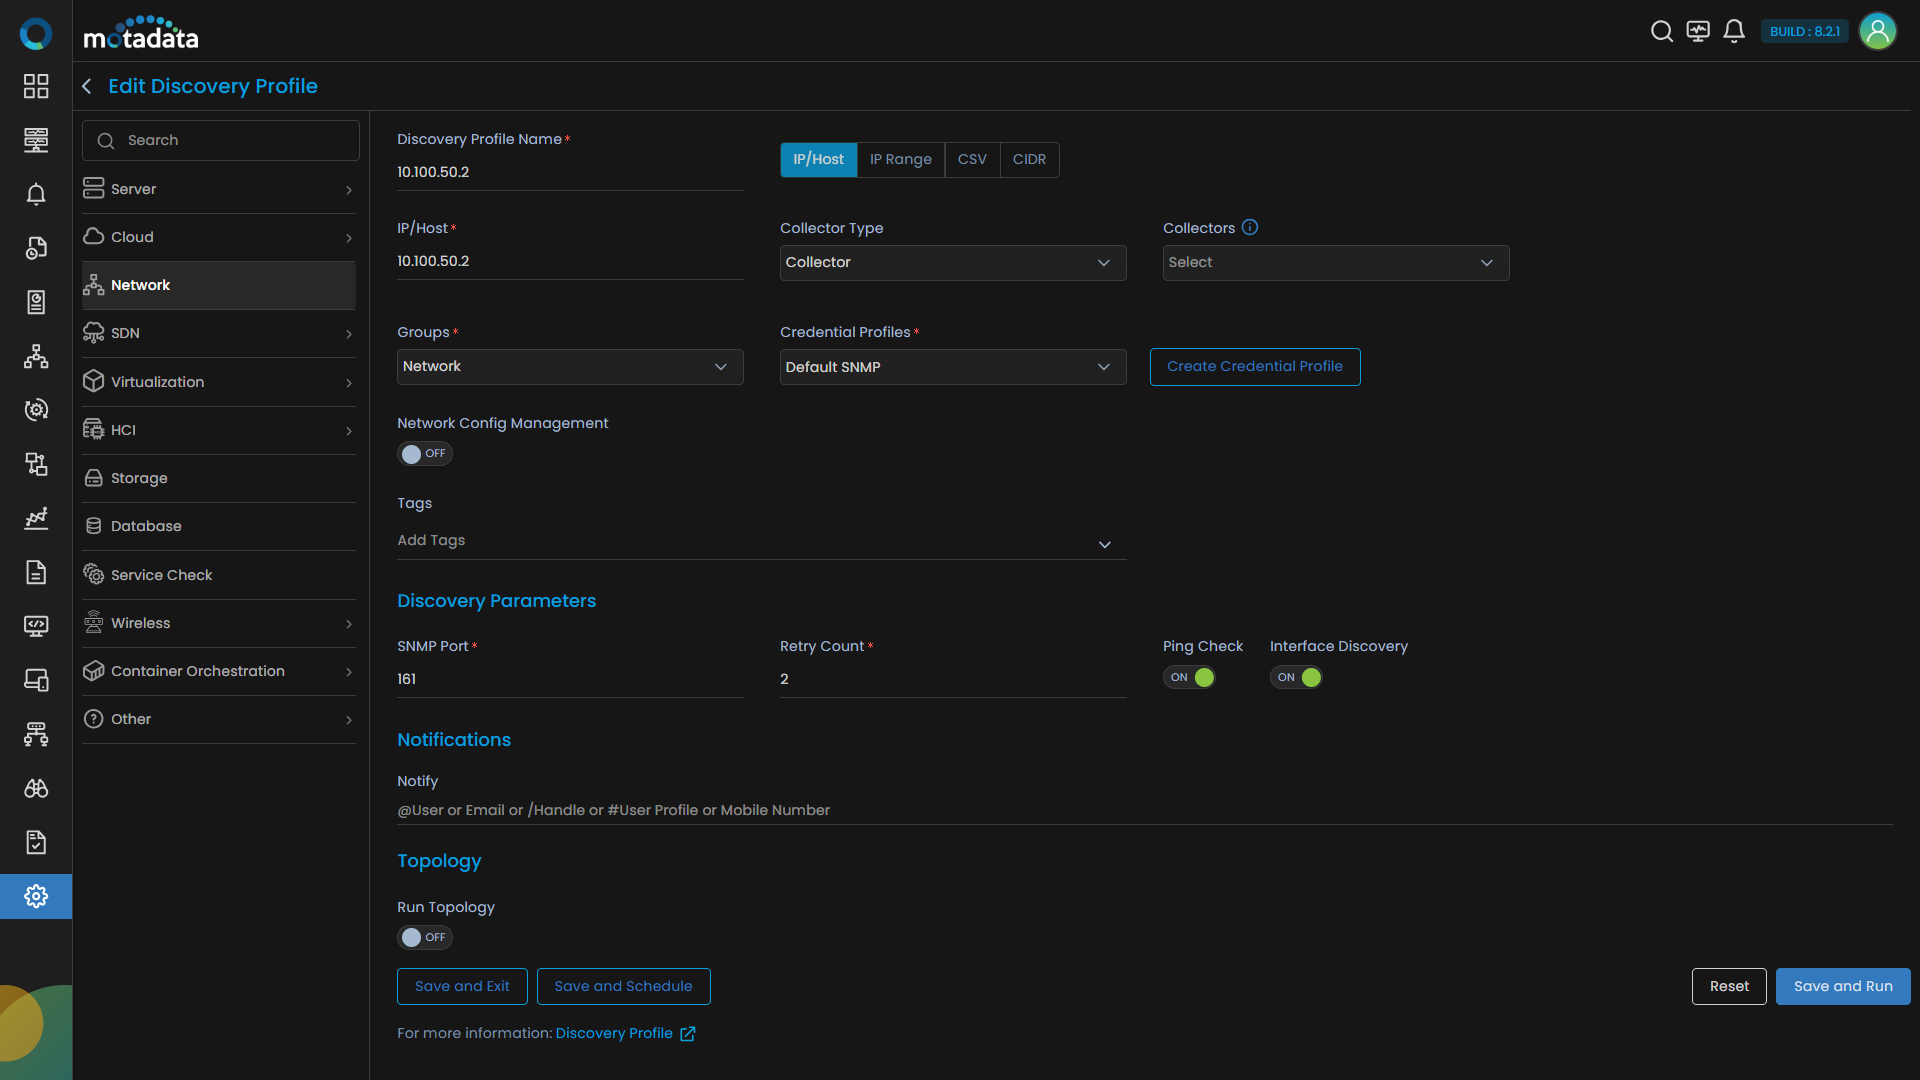
Update the fields you need to change. Select Save and Run to apply changes and run discovery immediately. Select Save and Exit to save without running.
How to Delete a Discovery Profile
Select in the Actions column. Select Delete Discovery Profile. A confirmation dialog appears. Select Yes to confirm.
Deleting a discovery profile does not delete the monitors that were provisioned from it. Those monitors continue running independently.
Troubleshooting
The discovery run completed but Discovered Objects shows 0. The devices at those addresses didn't respond. Check that the devices are powered on and reachable from the ObserveOps server. Verify the protocol port is open: port 22 for SSH, port 161 for SNMP, port 443 for Cloud APIs. Confirm the credential profile has the correct login details.
The discovery found devices but I can't provision them. You may have a duplicate monitor name conflict. On the Provisioning screen, rename any device whose monitor name is already taken by an existing monitor.
A scheduled discovery didn't run at the expected time. Check the ObserveOps server clock and time zone settings. If the scheduler was set with a different time zone in mind, the run time may have shifted. Edit the schedule and reset the time.
The discovery run shows as Failed in the Status column. Open the Actions menu and select Edit Discovery Profile to verify the credential profile is still valid. Credentials may have rotated since the profile was created. Update the credential profile with the current credentials and re-run.
Related Topics
- Credential Profile: create the login credentials a discovery profile needs
- Adding Cloud Devices: full walkthrough for Cloud discovery and provisioning
- Adding Network Devices: full walkthrough for Network discovery and provisioning
- Adding Servers: full walkthrough for Server discovery and provisioning